Have you ever lived paycheck to paycheck? Seems like we’ve all been there. One thing that is so helpful nowadays is the wonderful world of blogging and the internet. Seems like there are so many new resources to learn how to save money out there.
One way I just learned about saving money on groceries is through the $5 Meal Plan. Since it’s new to me, I wanted to get a couple peoples’ stories on how they use it and how it saves them money.
Before you read how they’re using it, here’s a little bit about the plan to give you some context.
A weekly menu that costs $5 per month to get.
You get 5 dinner entrees with sides (1 freezer friendly, 1 slow cooker, and 1 20-minute),1 lunch, 1 breakfast, and 1 random weekly goodie.
You can use the pre-made weekly meal plan and shopping list or a drag and drop Meal Plan Builder (which allows for dietary preferences, which I love).
Okay, now that you know what the plan is, here is what Andy and Jessica had to say about their experience with it.
Andy
What were your meals like before using the $5 Meal Plan?
I kind of winged it each week. I would look at recipe items and think, “that sounds good.” But, then, I would buy extra “just in case” groceries. I normally ended up with spoiled leftovers and produce that spoiled before I ever got the chance to use it. Not to mention, my grocery bills were higher than they’d ever been.
Why did you start the $5 Meal Plan?
My main reason to begin the $5 Meal Plan was to try and save money on groceries. I’m happy to say that’s definitely happening! And now, my family is being introduced to new recipes and ways to eat meals, which they have been thoroughly enjoying.
How do you use it?
I use the meal plan five to six times a week. I think I’m on week 41, but only because I started with the most recent. I’ve been building my own meal plans, but only because we haven’t always used all the previous weeks’ recipes and since I already have those ingredients, I want to be sure nothing goes bad!
What are your meals like now?
Our meals are amazing. Most of the time, I will tweak them. They’re definitely easier, especially since I know exactly what we’re eating each night.
I am saving a ton of money with the $5 Meal Plan. My grocery bill has dropped down about $50 each week.
What are the biggest benefits you see from this plan?
Knowing what we’re eating.
Knowing we have the ingredients.
Knowing they’re simple enough that our kids could also make them (when they ask to help).
Knowing I’m saving my family money.
What do you like best about the $5 Meal Plan?
My favorite part is the variety of meals.
Any downsides?
I wish they came out on Thursday instead of Friday.
Who would you recommend this to?
Everyone (and I do!).
Jessica
What were your meals like before using $5 Meal Plan?
Before $5 Meal Plan, the meals I cooked at home were still balanced and healthy, but they took forever to plan. I would shop on Sundays and look at the weekly ad. From the weekly ad, I would look up recipes that went with the proteins/ingredients that were on sale. And then I would make a list based off of those recipes, and finally head to the store. (Not to mention, look for coupons on top of the weekly ad sales.) Planning a grocery trip would take 2-3 hours.
Why did you start the $5 Meal Plan?
I started the $5 Meal Plan because of an ad on Facebook. I clicked on it and looked at the video, along with some of the sample lists and recipes. It honestly just seemed like a total time saver! And with the price point being only $5/month, I knew that if it wasn’t working out and I needed to try something different, I could back out if need be. So, I ordered my first plan and went from there!
How do you use it?
I am using the Classic plan and I use it for most meals of the week. (I do not use the dessert recipes or the lunch recipes, usually, but tend to use most or all of the dinner recipes.) It is just my husband and I in the house, so I cook the meals as directed, and we bring the leftovers for lunch the next day. I am a teacher and can’t leave the building for lunch, so it works out for me. If the protein or main ingredient in the recipe is not on sale, I usually substitute it for something else. (i.e. a whole chicken instead of a pork roast.)
What are your meals like now?
My meals are awesome! My husband is constantly going for seconds and is always giving me compliments. Plus, it’s saving me a huge amount of time planning the grocery store trips! I no longer have to search and search for recipes. I’m spending about the same money at the store (I wasn’t spending much before the plan), but it’s cutting down on SO much time!
What are the biggest benefits you see from this plan?
I truly see this plan as a way for people to save money, save time, and eat healthier! A lot of these meals are healthy for every member of the family and they use basic ingredients that you probably already have on hand.
What do you like best about the $5 Meal Plan?
I really like the new Meal Plan Builder option. If I don’t like one of the recipes on the current plan (which is rare, but sometimes happens!) then I can swap it out with one I like using the same main ingredient. Again, such a time saver!
Any downsides?
The only downside to this is sometimes the portion sizes are way off. They are all supposed to feed a family of 4, but sometimes we have way more leftovers than for just one day.
Who would you recommend this to?
I would recommend this to anyone with a family or anyone who is trying to find an easier way to cook at home, rather than resorting to fast food or take out every night. It really has helped our family.
A Final Note!
Also, there’s an option for dietary preferences, which is really important to me since I don’t eat meat or dairy (or sweets now, too!).
Jessica and Andy have had great experiences from it, and I love hearing first-hand how it’s saving them both time and money, while bringing in good food into their homes.
Cheers to spending less and eating better!
Original article and pictures take nataliebacon.com site
A goal without a plan is just a wish. – Antoine de Saint-Exupéry
I know the feeling of wanting something to happen but not being able to make it happen.
At one point, I hated my job and felt completely stuck in a career I wanted out of. I was in massive debt I thought I’d never pay off. I was completely stuck.
And here I am a couple years, and I’ve switched careers completely and have paid off over $100k in student loan debt.
What I learned through these experiences is that I can create my dream life by setting goals and creating a plan. And what I realized the most is that how you create goals and plans matters. A lot.
So, I came up with a list of the top ten mistakes I see with setting goals. These are the big mistakes that will stop you from creating your dream life.
Okay, now let’s look at the ten goal-setting mistakes I see all the time.
1. Not writing down your goals
It’s so important that you write your goals down. This is probably the biggest mistake I see the most.
Whether it’s on a post-it note on your mirror, in a document on your computer, or in some goal-setting journal that you create or use – you need to write your goals down.
It’s widely accepted that writing down your goals is an indicator of your likelihood to achieve your goals, so if you’re not doing this, start now.
I use a lot of things…
I use Dream Year to plan my year, month, and week.
You don’t have to use all these things, but you need to use something. The key is to do something – anything – to write down your goals. Find what works for you and do that.
2. Not using a task manager
Not using a task manager is a huge mistake related to goal setting. Using a task manager will ensure you do something every day toward your goal. Without it, you’ll have a goal and a deadline but no plan to accomplish your goal.
I use Dream Year and the Productivity Planner as task managers for making sure I’m on track with my goals. Before I did this, I had no way of planning out my days, and without a plan, I never made consistent, daily progress toward my goals.
Now, I plan daily tasks in my gcal and Productivity Planner (in order of priority), and the results have been exponentially greater. I get so much more done, and more importantly, I’m focused on doing at least one task to move me toward my goals daily.
Whatever task manager you prefer, use it – do not try to accomplish your goals without one.
3. Not setting a deadline for your goals
If you don’t set a deadline for your goal, you haven’t really set a goal at all – it’s more like a wish, and this just isn’t helpful.
You’ll find that achieving goals requires having a plan, which includes a deadline. The more concrete you can make your deadline, the better.
Put your deadline on your calendar or wherever it is that you manage your goals.
4. Setting too many goals
It’s common to get super excited about goal setting and in the midst of it set so many goals. You only have so much time to accomplish your goals, so choose wisely.
Quality over quantity is important when you’re setting goals. I like to set a couple for any given time frame, but generally, I try to cut down my goal list to as few as possible.
If you have a lot of things you want to do and have trouble focusing (this is sooo me!), I highly recommend reading Essentialism: The Disciplined Pursuit of Less by Greg McKeown. I thought I was organized, productive, and disciplined before reading this book. Then I learned that all that doesn’t matter without ruthlessly cutting things from your life and focusing on the priority (not plural). Anyways, I highly recommend this one!
5. Not making your goals specific and measurable
If you make your goals general, vague, and immeasurable, you aren’t going to be able to accomplish them.
Example of general goals are: “be better with money,” “get in shape,” and “focus on personal development.” All of these are great ideas, but you can’t know what it takes to achieve them. They’re not good goals because they’re never done.
Instead, make your goals specific and measurable. Examples of specific and measurable goals are: “get out of $10,000 of credit card debt by the end of the year,” “lose 15lbs by September 1st,” and “read one new personal development book and listen to one new podcast every month for 6 months.”
6. Not thinking long-term
If you set goals based on your daily tasks and what you need to accomplish in the immediate future without thinking about the long-term, you’re making a mistake.
It’s important that you have the end in mind when you set goals. You need to think about what you want for your whole life and work backwards, thinking about the next twenty, ten, and five years. Then, you can set the short-term goals. But if you work the opposite way, you may drift somewhere you never intended to.
For example, if you focus on work so much and set goals to achieve more work goals without thinking about the long-term effects of that, you may end up becoming some sort of workaholic who you never intended to be.
The lesson: think big-picture when setting your goals.
7. Not knowing your why
Having goals without knowing why you have them is going to leave you unfulfilled after you accomplish them.
Instead of setting random goals, learn why it’s important to you. What is your purpose in life or in the area you’re setting goals? What is your motivation for setting goals?
Once you know your why and have a purpose bigger than yourself, you’ll be able to accomplish your goals and feel good about your life.
8. Not saying “no” to other opportunities
Saying “yes” to one thing means saying “no” to something else.
For example, if you say “yes” to dinner plans and “yes” to every bachelorette party you’re invited to, you are saying “no” to whatever you would do during that time that would move your closer to your goals.
To make sure you’re prioritizing your goals and not putting other people’s plans above your own, I recommend planning appointments with yourself on your calendar to accomplish your goals. This way, you can say “yes” to opportunities from other people only when it makes sense for you.
9. Not committing to your goals
It’s all fine and dandy to use your tool of choice, to create an amazing plan to achieve your goals, but if you don’t commit to these goals, you won’t follow through.
I go into so much detail about this in Dream Year, but for now, just know that it’s super duper important that you commit.
Life is going to come at you fast. You’re busy. Stuff happens all the time that makes it impossible to accomplish much of anything. You don’t need me to tell you this! So, the stronger your commitment is to yourself and to your goals, the better chance you have at succeeding.
I really like keeping my goals list in front of me. I have my gcal with me at all times, I use my Productivity Planner in the morning and before bed, and I have Evernote up with my goals list in it. This might seem like a lot, but that’s how important my goals are to me.
I’ve committed to my goals, and by keeping these tools in front of me, I have drastically increased the likelihood of my success with each of my goals.
10. Not reviewing and revising your goals
The final mistake I see people make is not reviewing and revising their goals.
It’s not enough to set a goal and work toward accomplishing it blindly. You have to take time to evaluate your progress along the way. Ask questions like, “how is it going?” and “did you set the right goal?”. These will help you get a realistic picture of your goals.
Just because you set a goal does not make it permanent. Life throws things at you that you never could’ve imagined, so you have to be flexible to adjust your goals.
The key is to have a plan in place and review and revise it periodically, as your circumstances change.
*Bonus*
If you want to take it up a notch and ensure you’ll succeed, get an accountability partner. Someone who inspires you to achieve your goals — a friend, mentor, or partner.
Setting goals is the bomb dot com because it’s the secret to designing your future.
Check out Dream Year for all my goal setting advice (this is going to help you if you feel overwhelmed, overworked, and struggle to achieve the success and happiness you want in your life).
Setting goals is the only way I know how to turn what you want into what you have. Avoid these 10 mistakes and you’re on your way to being a goal-setting-diva.
For more of my free information on goal setting, join my goal setting course below!
Learn actionable strategies to set goals that you actually stick to in this free 5 day goal setting course!
Life Hack: How To Change Any Part Of Your Life Original article and pictures take nataliebacon.com site
10 Lessons Learned During My First Summer Gardening
Most posts contain affiliate links, which I earn a small commission from. These are provided for your convenience, and the price isn't increased at all.
Katie and I grew our first decent garden last summer.
We’ve attempted a few plants in the past, but they mostly failed. With a new house and a new yard more conducive to gardening, I decided to make a much larger effort to grow some food.
Both Katie and I helped our parents with gardens when we were younger, and we both had grandparents who were avid gardeners. Nevertheless, we learned a lot this year, and here are some of my top lessons learned.
1. Start Plants Indoor or Buy Starter Plants
Here in Colorado, the growing season is a little shorter than some places. It snowed about eight inches in May. Plus, June was super rainy, and with the thunderstorms came some serious rain storms. Too much rain can be as bad as too little.
The earlier you get you plants started the sooner they will mature enough to produce. Thus, the earlier you start your plants, the longer the growing season. A personal greenhouse would be ideal for this, but that is difficult to get for most people. Katie bought me this portable greenhouse, and I’m excited to use it this year.
We planted some green beans relatively early and the seeds got snowed on, and when a few little seedlings started growing they were attacked by hail and lost most of their leaves. I should have scrapped those seeds and seedlings earlier. I wanted to give them a chance, but with half a leaf they grew very slowly. I planted some new seeds, and they started growing very quickly.
We also used this to start a few plants indoors, and I think that gave some of our plants a decent start.
2. Plan on Getting Rid of Some Seedlings
The seed packets were a little vague about how much to sacrifice the seedlings of different plants. Thus, I ended up with all of my green bean plants way too close together. The idea is that not all seeds will germinate and grow, so plant more than you think you might need. Pull up the smallest ones and the ones that are too close together. Not exactly natural selection, but it might be close.
I almost wonder if having my green beans too close helped them with the intense sun here in the Denver area. The plants might have provided some shade for each other. The never seemed adversely affected by the heat.
3. Your Plants Will Likely Be Attacked
We have had a number of tomatoes, strawberries and cucumbers stolen from our garden. I haven’t actually caught the animals in the act, but I am fairly certain it is the squirrels that live near our house. It could have been birds as well, and I think I saw a mouse dashing through the bottom of our raspberry bush.
About ten of our cucumbers have had bite marks in them, which were just chucked over the fence towards the squirrels. They ran away with a few of them right in front of me. One thing you can do is buy some bird netting to protect your plants. I just used this on my strawberry plants. They seemed to particularly attract attacks.
Apparently you can buy wolf urine which will scare away animals, and there are some other commercial animal repellent products that might work. There are other home remedies out there, such as this homemade pepper repellent, which we didn’t really try.
4. Know Your Climate
I live near Denver, Colorado. We’re at a high altitude with relatively low humidity. Because of this, the temperatures here don’t often get near 100 degrees Fahrenheit too often, but the strength of the sun here is very high.
There is usually about a thirty-degree temperature difference between daytime and nighttime. It is also important to the think of your gardens micro-climates. Some parts of a garden might get shade. If you plant right next to a wall that gets a lot of sun, then the wall will likely reflect some light and heat. I’ve learned that here in Colorado, some shade is a very good thing. Some plants handle the heavy sun better than others. My squash and zucchini plants seemed to do okay with a lot of
I’ve learned that here in Colorado, some shade is a very good thing. Some plants handle the heavy sun better than others. My squash and zucchini plants seemed to do okay with a lot of sun and very little shade. My cucumbers had some shade, but they still seemed to get dry spots on their leaves. Try to create a layout for your garden in a way to give you plants their best chance to succeed.
I planted my cherry tomato seeds three or four feet away from my strawberry plant. By this time of the year, late summer, my strawberry plant gets half as much sun as it used to get. My cherry tomato plant is rather huge. It nearly covers the strawberry plant and my green onions. My raspberry plant now covers a few of my green beans.
A plant’s location might be affected by the path of the sun. It will change from spring to fall. In the northern hemisphere, the sun rises and sets farther to the north during the summer. During the winter, the sun rises and sets farther south. This will affect shade patterns. So, if you are planting in a shady spot in the spring that might not be a shady spot during the middle of the summer.
6. Don’t Spray Water on the Leaves
This has something to do with evaporation. Wet leaves will actually lose water. You want to water at the base of the plant, and it is best to not water during the heat of the day. As a side note, the hottest part of the day isn’t noon, but early afternoon after the heat has built up for a while. Don’t water seedlings too much, and as your plants get bigger they will need more water. Plus, as your plants are getting bigger it is also getting hotter outside. This works for grass too, which I’ve had to water myself for the first time. We never watered our yard when I was growing up.
7. Be Prepared For Sudden Bounties
Our garden seemed to take a long time to mature and produce. I watered and waited for what seemed an eternity before the first vegetable could be eaten. However, once the plants had matured they suddenly started getting large amounts of vegetables. I just chucked about two grocery bags of vegetables into the trash today, because I failed to plan on how to use or give them away.
We got huge numbers of cucumbers, and so I ended up give some away and canning others. Fortunately, Ball generously gifted us with some excellent canning supplies (basically their entire FreshTech line) over the past few years so that wasn’t too difficult. We ate a lot of squash and zucchini for a while, but we could only eat so much. Just be prepared for your garden to produce in bursts. Plant a variety if you want to eat a variety. I think we planted too many of the same plants.
8. Watch Out for Mildew
Our squash and zucchini plants ended up with serious mildew or fungus problems. I should have culled the blighted leaves early on, but instead I let it spread. The infected leaves died, and the plants grew new and younger leaves. However, their production sharply dropped as this happened.
There are a couple of home remedies for treating plant mildew. You can mix 2-3 tablespoons of apple cider vinegar (containing 5% or less acetic acid) with one gallon of water, place in a spray bottle, and spray it on the leaves . You can also mix one tablespoon baking soda with a teaspoon of dormant oil and one teaspoon liquid hand soap (you can get some free hand soap and $10 off your first order from ePantry if you want some good, natural products to use) into a gallon of water and spray on the plants ever 1-2 weeks.
9. Make Sure You Puncture Those Holes on the Bottom of Pots
Plastic potting pots have tabs you can poke or puncture to help excess water to drain. Katie and I had successfully planted and grown bell pepper seedlings inside. Shortly after we transported the potted plants outside to get used to the weather and conditions it rained rather heavily. Unfortunately, the rain did not drain, and our pepper plants drowned. They could not be saved. Since we love peppers, and they can be expensive at the store, we were disappointed about this failure.
10. Fertilize
When you plant your seeds or seedlings you should figure out what type of soil and fertilizer is best for that plant. Most plants could use a mulch of some kind. Plants don’t usually do well in sandy or hard, stony soil. The softer soil will help water to actually seep down to the roots and stay there for a little bit. I recommend buying a soil testing kit to make sure the soil you are using is even hospitable for planting.
Fertilizer should be added throughout the growing season about every couple of weeks. I found something in our garage that was labeled tomato food that could be mixed with water, but it could also be used for other vegetables. Most plants use very similar nutrients. Plus, on the fertilization theme – flowers come before fruit. Bees and other pollinators help with the plants fertilization process to produce fruit.
I’m sure we have some avid gardeners out there – we’d love to hear some of your best tips for gardening in the comment section!
Original article and pictures take www.clarkscondensed.com site
10 Solutions For Your Most Annoying Kitchen Storage Problems
Whether you have a spacious kitchen or a tiny kitchen, chances are you have at least one item you just can’t figure out how to store properly. It may be a stack of things that always seem to be disorganized, or it could be an item that doesn’t quite fit in the space you’ve stored it in. Regardless of what the specific problem is, it’s really annoying, and it adds unnecessary stress to your day.
More Ideas You'll Love
I’ve had my fair share of annoying kitchen storage issues over the years, and I’ve managed to find simple solutions for many of them. I wanted to share a collection of those solutions with you today, in order to help you tackle your own kitchen storage nuisances! After all, it’s almost time to start thinking about spring cleaning. And if you’re going to be deep cleaning your kitchen, you might as well get more organized while you’re at it, right? :-)
10 Smart Solutions To Annoying Kitchen Storage Problems
1. Bulky Items
We all have one or two bulky kitchen items that drive us crazy. I used to have this potato masher that would always get stuck when I tried to open the drawer I stored it in, and it drove me crazy!
For those bulky, annoying items that just don’t fit anywhere else, why not store them on pegboard? It’s an easy and effective solution for storing just about anything in your kitchen.
2. Paper Towels
If counter space is hard to come by in your house, even keeping a paper towel holder on the counter can be out of the question! Luckily there are a lot of clever alternatives for keeping paper towels close at hand, but off your countertops. You can find paper towel holders that you can attach to your wall, under a cabinet, or over a cabinet door.
3. Printables & References
Keep your printables and other helpful references close at hand by hanging them up on the inside of one of your cupboard doors. (If you haven’t downloaded any of my helpful printables, I’ve linked to a couple of them below!) The inside of a cupboard door is also a great place to keep measuring cups and spoons!
More Ideas You'll Love
4. Hard-To-Reach Corners
It can be difficult to reach the items in the back of a cabinet, especially if that cabinet is up high or down low. One simple way to make those items more accessible is to add a lazy susan to your cupboard! Place the items on top of it, then just spin it to easily find what you need.
5. Small Items
Your kitchen cupboards can store a lot of stuff, but it can be tricky to keep things organized when you’re storing small items. Corral your small items together with an under-the-shelf basket like this one. You’ll be able to store more stuff in a more organized way!
6. Mixer Accessories
While I love my KitchenAid stand mixer, finding a place to store the big attachments can be a pain! I kept them in a drawer for a while, but they would often cause the drawer to get stuck as I was opening it. I finally just decided to store my mixer attachments in the bowl of the mixer itself! Other options for storing those bulky mixer accessories are hanging them on pegboard, or hanging them on Command hooks in your pantry or cupboard.
7. Cookie Sheets
I used to keep my cookie sheets stacked flat in one of my larger cupboards, but I quickly realized I needed a better solution. They don’t stack very nicely, so stuff kept sliding off of them and creating chaos in the cupboard! Now I use a rack so I can store my cookie sheets vertically! You can also achieve the same effect using tension rods placed vertically, or using a few bungee cords!
8. Mason Jar Lids
Mason jar lids and rings can be annoying to store too. The trick is to use a container with two compartments, so the lids and rings are stored in together without becoming a jumbled mess.
More Ideas You'll Love
9. Utensils & Tools
If your utensil drawer is a mess, or gets snagged when you try to open it, try using a utensil crock. I keep my bigger items like wooden spoons, whisks, and spatulas in a crock on my countertop, which keeps my utensil drawer much more organized than it used to be.
10. Spices & Seasonings
One of the best things I ever bought for my kitchen cabinets is a tiered spice rack. It makes it so much easier to see what spices I have and to locate the one that I need. You can also find ones that pull down to make them easy to reach if they’re in a high cupboard.
Original article and pictures take www.onegoodthingbyjillee.com site
I am happy to partner with HomeRight on this post. As always all opinions are 100% my own.
The flu bug definitely invaded our house these past couple of weeks – and it was a nasty one! I don’t think that the kids have ever been down for so long or slept so many hours. They were literally in bed for days and didn’t even want to watch t.v. or go on their ipads {which is a BIG indicator of how sick they were!}
I don’t know about you, but I am always eager to give the house a good clean after we have had an illness. Kids are not pretty when they are sick {and for that matter, neither am I}, and I hate to think of all the germs and grime lingering around the house. Between the runny noses, missed trips to the toilet and constant coughing, the house was ready for a good clean!
Step 1: Gather Your Cleaning Supplies
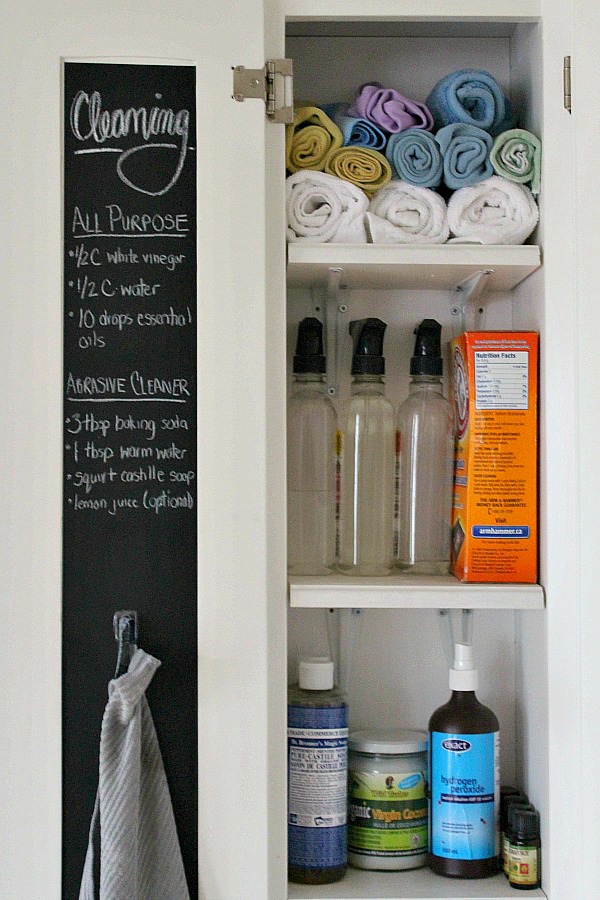
Disinfectant Store bought disinfectants or wipes – Be sure to follow instructions on the bottle for directions as it will need to sit on the surface for at least 1-2 minutes to take effect. Wipes may be an easier choice as you just wipe it on and let it air dry. DIY “Green” Disinfectants – There are greener disinfecting cleaners that you can try as well although the efficacy may be slightly less and you will have to put in a little more scrubbing power. Try spritzing 3% hydrogen peroxide onto hard surfaces {I just add a spray top to the bottle} and spray onto hard surfaces. After allowing it to sit for a couple of minutes, wipe with water and a microfiber cloth. You can also try mixing a 50/50 mixture with water. Just be sure you are using the 3% version of hydrogen peroxide and test for colorfastness on any surface that may be a problem {I have personally never had any problems but it does have the potential to have a bleaching effect}. Alternatively you can use a 50/50 water/vinegar spray. While hydrogen peroxide followed by vinegar can increase their effectiveness, they should NOT be mixed together. If you need something stronger you can mix up a bucket with a gallon of water and 1/2 cup of bleach.
Microfiber Cloths I generally use my Norwex cloths when I am concerned about truly getting surfaces disinfected, but I know there are many other brands of cloths out there. I fold up the cloths into smaller squares so I can switch to a clean square when I change areas and I like to have two cloths – one for scrubbing and one for wiping dry.
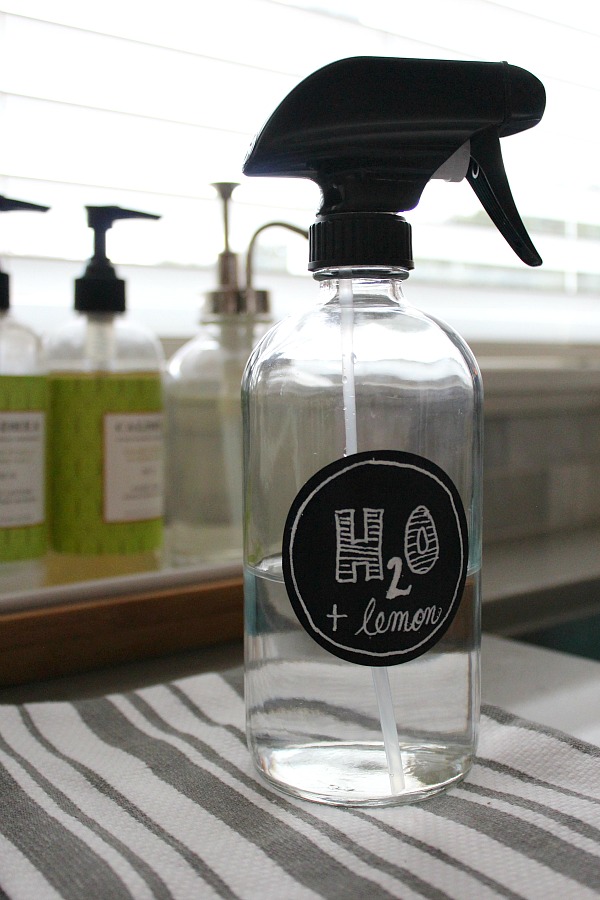
Essential Oils – I have a spray bottle of water that I use for cleaning and add about 20 drops of essential oils to it to help give the area a fresh scent. Following the disinfecting spray, I spray the area again with water and give it a final wipe with a dry microfiber cloth or polishing cloth. I love the citrus scents {such as grapefruit and lemon}, but tea tree oil or thyme oil are other good antimicrobial oils. You can read more about the different essential oils and their cleaning properties HERE. If you have a diffuser, you can also put some oils in there while you are cleaning to freshen the air.
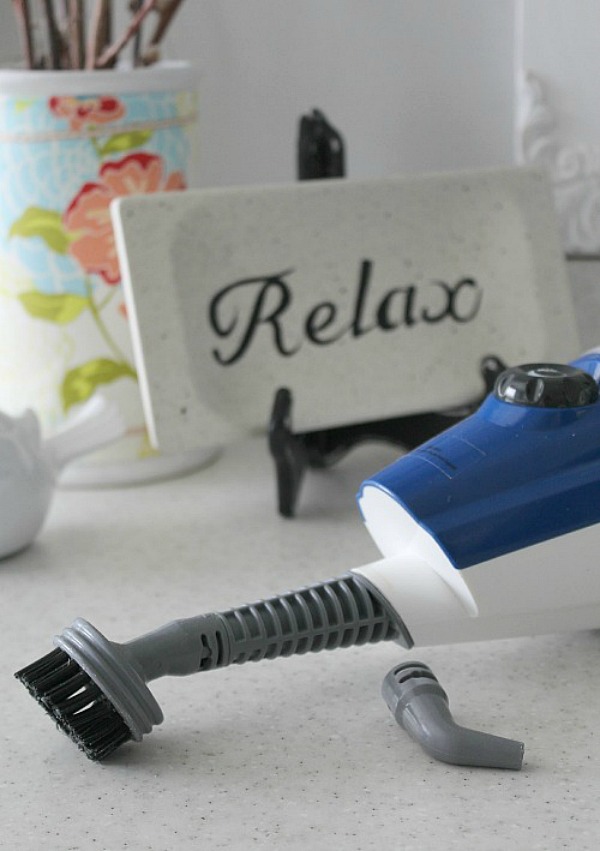
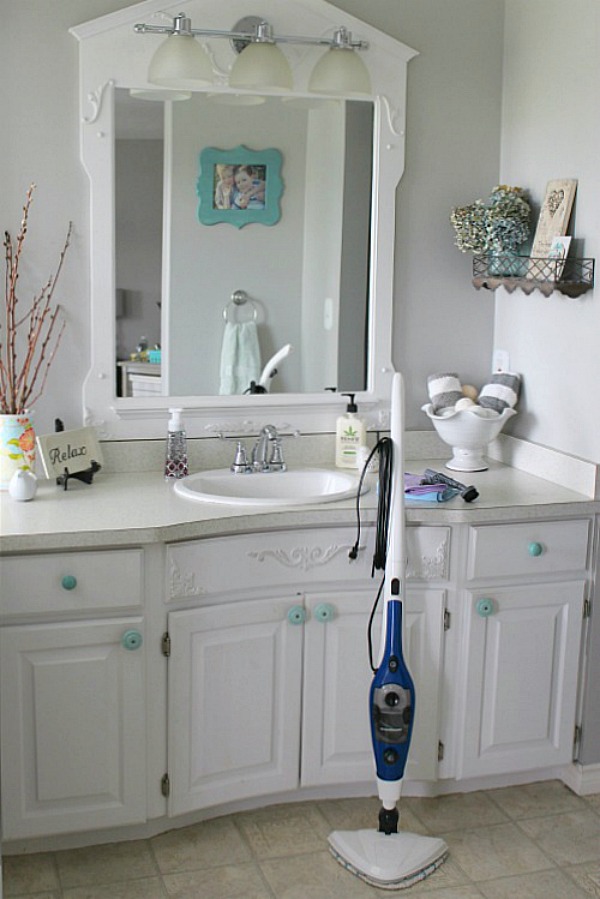
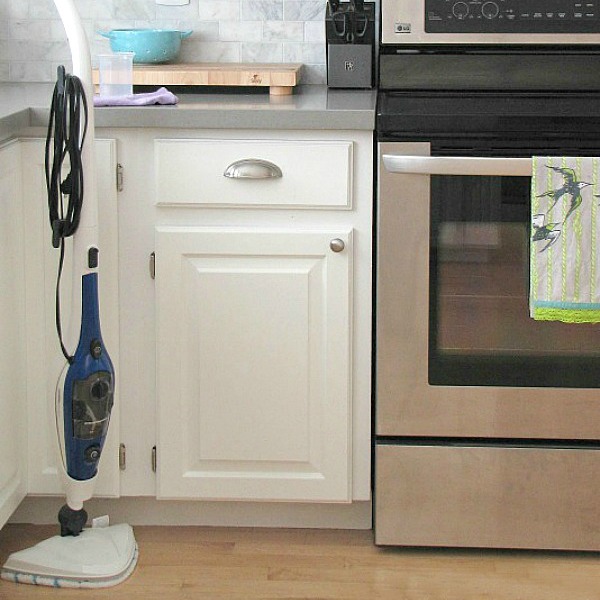
Steam Cleaner While this isn’t essential, it sure makes cleaning a whole lot easier and will disinfect without having to resort to harsh chemicals and a lot of scrubbing. I have used both the HomeRight Steamer as well as the HomeRight Steam Machine Plus, but tend to stick more with the Steam Machine Plus simply due to its portability. The Steam Machine heats up within 30 seconds, so even if I am unplugging it and moving around to different parts of the house, I don’t really have to wait for it to heat up again. Both machines come with a wide variety of attachments to tackle any space or surface.
If you haven’t used steam to clean before, you are missing out! The HomeRight Steamers use high temperature, high pressurized steam to loosen and dissolve dirt, grease, and grime {and whatever else!} and kill 99.9% of all germs and bacteria without the use of any chemicals. They also blast out that grime from those little cracks and crevices that are hard to reach. To clean a surface, I just use the steamer over it with the appropriate attachment and follow with a wipe from a microfiber cloth. No power scrubbing required!
Step 2: Let the Sunshine In
Before you get started, try opening the windows up for some fresh air {even if it is just a crack!} and lift the blinds all the way up to let in some natural light. If you have a diffuser, add some citrus essential oils for a crisp, fresh scent.
Step 3: Get Cleaning
Here my Top 10 Things to Clean After the Flu {or other illnesses}….
1. Bedding, blankets, and other “sick” clothes.
You tend to sweat a lot more when you are sick, so strip down your bedding, gather up any throw blankets from the sofa, and add in pajamas and any other “sick” clothes. Be sure to check for and treat any stains prior to washing {the 3% hydrogen peroxide works great for this but again, just check for colorfastness}. Run everything on the hottest temperature that the material allows, but be sure not to overload your washing machine. This, unfortunately, may take several loads! Pillows can also be washed in the washing machine – just be sure to follow care instructions on the pillow and place two pillows in the load {on their own} to balance out the load.
2. Your Mattress
If there are any fluids that have made their way through the bedding and onto the mattress, be sure to give it a good clean. You can find more information on removing mattress stains and how to deep clean it HERE. Even if it hasn’t been hit, it can do with a good airing out, so leave those sheets off all day if you can, and open the windows {if possible} and all of the blinds in the room to allow some fresh air and sunlight to hit it. You can give it a light misting with the water/essential oil mix but ensure that you are not saturating the mattress and allow it to dry completely before putting the bedding back on.
3. The Bathroom
If your have multiple bathrooms, try to confine the sick parties in your house to one bathroom only. This will help to prevent the spread of the illness as well as make your clean up much quicker and easier. The bathroom will need a good cleaning and disinfecting after illness – especially the sink, faucets, toilet, and toilet handle. I love using the steamer in the bathroom as it really cuts down on time and gets into all of those little cracks and crannies that are hard to reach {especially around the toilet and faucets}. I also know that I am getting a good disinfecting without having to go back to the chemical cleaners. Around the toilet and sink, I will often spray some hydrogen peroxide/water mixture prior to steaming and let it sit for a few minutes. You can read more about how to deep clean the bathroom HERE.
4. Your Toothbrush
If you have a cheap, disposable toothbrush that you have used for a while, you may just want to throw it away and get a new one. For newer or more expensive toothbrushes, add some hydrogen peroxide to a cup {enough to completely submerge the bristles} and allow to soak for 30 minutes. Rinse thoroughly with water when you are done.
5. Towels
Try to change towels daily during an illness and make sure that everyone has their own set. You may want to try temporarily using paper towels instead of hand towels to make things a little easier and remember to encourage everyone to wash their hands frequently and thoroughly. Once the illness is over, gather up all towels and wash at the highest possible temperature. You can add some vinegar to the laundry load if you have some smelly towels or add some to your fabric softener dispenser for fluffier towels.
6. Stuffed Animals and Toys
Stuffed animals can be tossed into the washing machine with the other bedding to give it a thorough cleaning or you can give them a good steaming if they are too delicate to run through the washing machine. For hard surfaced toys, use the small scrub brush attachment on the steamer to give them a little scrub and steam, and then wipe dry with a microfiber cloth. Alternatively, you can place them in the top rack of the dishwasher {place small items in a mesh laundry bag} and run them through a cycle.
7. Hard Frequently Touched Surfaces
Germs survive the longest on hard, non-porous surfaces so try to wipe these down frequently during an illness with a disinfectant or give them a steam and a wipe with a microfiber cloth. These can include light switches, door knobs, railings, or any other surface that you frequently touch. If you have a steam cleaner, just blast the areas with the steam and wipe with a microfiber cloth. I also like to add some essential oils to the water in the steam cleaner to get a nice scent and for some extra cleaning power. If you don’t have a steamer, disinfecting wipes are probably the best bet because it can be hard to get a spray to sit on the surface long enough for disinfecting.
8. Electronic Devices
Wipe down all electronic devices that have been used such as phones, cell phones, computers, tablets, keyboards, and t.v. remotes using a disinfectant wipe, cotton pad soaked in rubbing alcohol, or a slightly damp microfiber cloth using hydrogen peroxide. Allow to air dry.
9. Waste Baskets
Your garbage cans have probably held a wide variety of nasty things during an illness so don’t forget to give them a good clean once you have emptied them. You can either give it a good steam or spray with a disinfectant {leaving it for at least a few minutes} before scrubbing. It is obviously helpful if you can remember to line them with a plastic bags to help contain any germs prior to anything being put in there.
10. The Kitchen
Try as much as possible to keep sick kiddos out of the kitchen. This is the one time that I am happy to get the kids all of their food, snacks, drinks, and whatever else they desire! While everyone is sick, wipe down the refrigerator door handle and any other frequently used cabinet/drawer handles daily with a disinfecting wipe or rubbing alcohol pad. Once everyone is feeling better, I will steam our countertops, fridge, and sink. I also spray the cupboard handles and drawer pulls with hydrogen peroxide and, after letting it sit for a few minutes, wipe it down with water and a microfiber cloth and give the cupboards a quick wipe if needed. You can read more about how to use steam to clean the kitchen HERE.
While the list may sound long, it really doesn’t take too long to run through – other than waiting on all of the laundry!! Remember that if you are able to confine those that are sick to just a few spaces in the home {usually the bedroom, a bathroom, and the sofa!}, it will be a lot less to clean!
And, finally, I have a GIVEAWAY for you!! HomeRight is offering a Steam Machine Plus to one reader to help make their cleaning routine a whole lot easier! Just follow the prompts in the Rafflecopter below to enter.
Original article and pictures take www.cleanandscentsible.com site
10 Things You Should Consider Before Starting A Blog
“Should I start a blog” is something I hear a looooot.
I knew I wanted to start a blog because I had a ton of student loan debt, and I wanted to help people learn about money.
Now, I talk with people all the time about starting a blog. They share their biggest fears with me, and that’s how I came up with this list.
This is a list I created from all the things people share with me about their concerns with respect to starting a blog.
1. What To Blog About
Here’s my advice for knowing what to blog about:
If there’s something you’re really passionate about, go with that.
If you’re unsure about what to start a blog about, then consider two things:
What you like doing, and
What there’s a market for
Your blog needs to be something that people want to read, so look at what’s already out there. Is there some blog that you love to read that you think you’d also like to write?
Don’t start a blog about your life unless you are a spectacularly unique or famous person – no one cares.
People read blogs because they want to know what they can learn and apply to their lives. People are always thinking “What’s in it for me?” (WIFM), so your job as a blog is to:
Find who you want to help (your target market), and
Ask them what they need help with
Blogging is about providing value and helping people. The more value you produce to the world, the more you’ll be paid. So, choose something you want to help people with.
2. What To Name Your Blog
I hear people get stuck on what to name their blog a lot.
What I say to them is that so long as your blog name isn’t obscene, it really don’t matter as much as you think.
Give yourself a deadline to make a decision about a name (not more than one week), and make the choice and don’t look back.
Here are a couple ideas for what to name your blog:
Your personal name (like I do)
A name that suggests what the blog is about (e.g.: my blog used to be called Financegirl, which was obviously about money for women)
If you go with your first and last name, keep in mind you won’t be able to sell it down the road (or it will be very difficult to sell, if you do). This isn’t something you’re probably thinking about now, but keep it in mind. If you’re all in and know you won’t sell, then your name is a good way to go.
If you’re still stuck, here are a couple tips that can help:
Research other similar blogs in your niche and see what their blog names are
Come up with a list of 10 blog blog names and ask for feedback
The name of your blog isn’t determinative of your blog’s success, so don’t stress out about it too much. Certainly don’t spend more than two weeks deciding!
3. Your End-Goal For Starting A Blog
I actually don’t hear this concern enough. But it should be one!
People tend to think about whether to start a blog from the perspective that it’s all about them, instead of what their end-goal is, which I think is a mistake.
Here are three very different end-goals for starting a blog:
To make money (run a profitable business)
To become an influencer (popularity is more important than profitability)
To share your life story (diary blog)
The strategies you need to take to achieve each of these end-goals for each are completely different.
For example, I have always wanted to make money blogging. But for the first two years of my blog, most of what I did centered around popularity. I focused a lot on social media and trying to become an influencer. No wonder I didn’t make much money!
My point is that if you can be incredibility focused about your end-goal from the beginning, your likelihood of success is much greater and it’ll happen much faster.
Oh, and here’s something I really like to remember if your goal is to make money blogging:
Value > profitability > popularity
The more value you provide, the more money you’ll make. And if your goal is profitability, then focus on that — not popularity.
This little nugget is super important to remember if your goal is to make money blogging. If it’s not your goal, then you can switch those words around (maybe popularity is most important).
4. The Fear Of Starting
I hear about the fear of starting from almost everyone considering starting a blog.
The good news is this is totally normal.
Your brain naturally goes into a place of fear-based thinking any time you consider doing something out of your normal routine. This is just the way the brain works. It was super helpful for getting humanity to survive to this point. It’s also super helpful if someone is about to mug you or break into your house. But it’s not helpful when you’re considering pursuing something new that pushes you outside your comfort zone.
When you experience fear around starting a blog, you don’t have to listen to it. You can do it whatever it is you want to do even with fear there. I like to say “oh, hello fear. I see you, and I hear you. But you’re not useful here.”
The more you practice acknowledging your fear and acting in spite of it, the easier this gets over time.
So, if you feel fearful about starting a blog, that is normal. And you should do it anyways.
5. The Time Commitment
The time commitment for starting a blog is something you need to consider. It ain’t no joke!
The more committed you are to your blog, the more likely it will be a success. For example, if you work on your blog 2 hours per day and 6 hours on the weekend days, I think you could have a wildly profitable and successful blog 1 year from now.
On the other hand, if you’re only working on it for 2 hours on a Sunday afternoon and that’s it, your blog probably will just be a hobby.
Think about what your end goal is for your blog and acknowledge that the bigger the goal, the bigger the time commitment.
I blog and work full time (and maintain my relationships!) but it takes incredible intentionality with my time (here are my top productivity tips for reference). I get up at 4:30am or 5am and blog before work, and I spend many weekend days at a coffee shop blogging for hours at a time. It takes that level of commitment to do it all.
You can put it less time that I do, but just know that the amount of time you put in will directly correlate to the results you get.
6. The Financial Investment
The financial investment for starting a blog is something you should consider.
Do not start a blog for free. You can technically do this, but it won’t last. You will end up moving your blog to a paid platform if you stick with blogging, and moving it is a big pain (and way more expensive).
There are platforms that allow you to start a blog for free, but you’ll have something in the name of your blog that suggests it’s a free blog, which means people won’t read it or take it seriously. It’s like if my blog was “nataliebacon.wordpress.com” – what? No. Just no.
Not only that, but you won’t own your blog. The free platform where you have it will own it. Not great.
Instead, the go-to platform (that I’m completely bias toward) is starting a WordPress, self-hosted blog (you can read my how to start a WordPress tutorial here).
There will also be blog services that you can use for free instead of paying for, and many of them will have very limited options when it comes to functionality.
For example, it took me two years to get 2,000 email subscribers because I was using Mailchimp (free). Now, I have 25K because I pay use ConvertKit (paid). Had I started with ConvertKit, my email list would be so much bigger, and I would’ve made money a lot faster. (Here’s my review on 4 email services for bloggers.)
All this is to say that there are certain start up costs that go into creating a blog. When I started blogging, I would freelance write and babysit to bring in money quickly to pay for blog expenses. It was 100% worth it.
Here are a few examples of blog costs…
Creating and launching your blog:
Buying your domain name (see my how to start a blog tutorial for more on this)
Paying for annual blog hosting (again, see my how to start a blog tutorial)
Website design (Divi Theme is super popular right now)
You can reference my How To Start A Blog post for specific steps on how to get started creating a blog.
Your blog expenses will vary, but you could spend around $1,000 the first year, I’d estimate.
If your goal is to make money blogging, it’s worth it to invest in the beginning because you’ll build your blog faster and avoid making mistakes (e.g.: using free software that’s never updated so you lose functionality and things start breaking).
Along the way, you’ll get used to spending money on your blog (and it gets easier once income is coming in!). The more you invest in your blog, the more you’ll get out of it.
When I started blogging, I didn’t want to pay for the expenses so I would babysit and freelance write (here’s a good story about how 3 freelancers make $10k+ per month writing). This extra money allowed me to invest in my blog until it was profitable and I could quit. I did this for almost the entire first year.
7. The Vulnerability Of Being Online
For your blog to be good (and worth reading) you have to be authentic. People will only become followers if they trust you. People will only trust you if you’re open and honest with them.
This can be pretty scary at first.
That’s the bad news. The good news is that every time you’re vulnerable and open with your audience, it gets a little bit easier.
People ask me about blogging anonymously, sometimes. I don’t recommend it because eventually, you (as the anonymous blogger) end up breaking your anonymity and it’s a bit of a challenge to do. That said, if it’s between not starting a blog and starting one anonymously, then I say go for it and be anonymous until you’re comfortable.
The more open and authentic you can be from the beginning, the better. And, again, it get easier over time. You start to not care as much about other people’s opinions. (If you haven’t heard “the man in the arena” speech by Theodore Roosevelt – go find it right now!)
8. Getting People To Read Your Blog
It’s one thing to learn how to create a blog and get it up and running (without crashing!).
It’s another thing to get people actually reading your blog.
I’ll never forget my aunt said to me once that she had a friend who had a blog that no one read. My aunt thought this meant the blog was bad if no one was reading it. I laughed. I knew that couldn’t be further from the truth.
People don’t find blogs. Bloggers push their blogs in front of people.
Enter: digital marketing.
You have to learn how to drive traffic to your blog.
This is the secret to getting people to read your blog. They’re not going to find it otherwise.
Of course your content needs to be good, but that’s just a given. You can have great content that no one ever reads because you haven’t marketed it.
For new bloggers, there are many things you can (and should) do to drive traffic to your blog intentionally. This shouldn’t be a reason for not starting a blog. But once your blog is up and running, you do need to focus on getting people to read it and growing it.
I suggest starting with learning how to drive traffic from search engines, starting with Pinterest (because it’s easiest), then moving to YouTube and Google. Notice that these platforms are search engines (not social media). I took Pinterest Traffic Avalanche (an online blogging course) and learned how to drive traffic to my blog through Pinterest. I get most of my traffic from Pinterest, and I highly recommend the course.
Social media is great but it’s more about connecting than it is about traffic.
Without getting in the weeds too much for this post, just know that you’ll need to get on board with marketing (and sales, too for that matter) if you ever want people to ready you blog.
9. How To Make Money From Your Blog
Most people I talk to want to start a blog and make money from it but are concerned they won’t be able to.
Starting a profitable blog is totally possible. I did it. And you can, too.
But, there’s a problem…
There are SO many fancy, sexy, amazing things that will present themselves to you in your blogging journey that distract you from actually making money from it.
If you get one thing from this post, it should be this:
Value > profitability > popularity
Soooo many new bloggers obsess over becoming popular online, when their goal is profitability.
You can be very popular online and make little to no money at all.
Yes, you can have both. But you can’t focus on both at the same time to start with. So, if your goal is profitability, make sure you take action in line with that goal.
This means focusing on monetization strategies and not popularity strategies. For example, learn how to make money with affiliate marketing and digital products, while saying no to interviews. It’s hard to do because interviews and opportunities to write for other blogs and speak may come up — but often they’re unpaid. These things are great if you’re already making money and want to promote and grow your audience. But they have little, if anything, to do with monetizing.
From a practical perspective, here are the resources I have used and highly suggest for learning how to monetize a blog:
I’ve used these courses and they each gave me insight into creating a specific monetization strategy for my blog. Without them, I would be lost.
10. The Uncertainty Of Not Knowing Whether It’ll Be A Success
People share with me that they’re afraid to start a blog (#4 above), but I also hear them say they want to know ahead of time if it will be a success so they know how much to put into it.
This thinking is completely backwards.
If nothing else, remember this: you get back what you put into your blog.
You have to commit to it 100% for it to be a success. And if you do, then you’ll find a way.
You are going to have blog failures. That doesn’t mean your blog will be a failure. It just means there will be challenges – like anything else. This is part of business – eerrr life!
There is no way to know what will happen, so get in the right mindset. Treat your blog like a priority. Commit to it. Believe in your heart of hearts that it will be a success.
The more you act like your blog is going to be a success, the more you’ll take action and get results that make it a success.
You can’t get the results first. You have to believe first. Then, you’ll get the results.
A Final Note!
Everything is figure-out-able.
Everything.
So, I say go for it.
The worst case scenario isn’t that you waste money, time, or that your blog fails.
The worst case scenario is that you don’t go for it and stay exactly where you are right now.
I had no idea that starting a blog would change my life.
I was able to leave a career I hated and take a 50% pay cut but continue to pay down my student loan debt because of my blog income.
Not only that, but I learned about business, made new friends, and continue to grow as a person in ways I never expected or could’ve predicted.
I make over $4k $5k per month online while working full time. If I let fear get in the way of that, I would’ve been never become this version of myself.
Go for it. It’s worth it.
P.s. – here are my favorite free blogging resources:
Epsom Salt is one of those wonderful things that has a huge variety of uses and isn’t very expensive. I always have some on hand. We actually go through it quite often because there are so many unusual uses for Epsom Salt. It’s not just your grandma’s go to for tummy troubles, there are so many other great ways to use Epsom Salt!
Here are some of our favorite unusual uses for Epsom Salt throughout the home and garden.
1. Take a Bath – A warm bath with Epsom Salt is a terrific way to relax sore muscles. Pour a cup of the salts under the running water and settle in for a soak. Or mix them with your favorite essential oils to make it even more relaxing. Try these Eucalyptus Spearmint Bath Salts or the Lavender Bubbling Bath Salts for inspiration.
2. Soak Your Feet – Epsom Salt is a triple win for feet. Re-invigorate those tired toes by adding 2 tablespoons to your footbath. Use a little extra as a scrub to make heels soft and smooth. It fights athlete’s foot, too! These Peppermint Bath Salts would be the perfect soak for tired feet.
3. Use in the Laundry – One of my favorite homemade products is Laundry Scent Booster. I use epsom salt and essential oils to boost the scent in my laundry instead of brand-name, chemically laden ones.
4. Remove Splinters – Splinters can be painful but removing them doesn’t have to be! Draw the splinter out by soaking the affected area in warm water with Epsom salts.
5. Help Skin Irritations – Epsom Salt baths are also great remedies for skin irritations. Whether it’s a mild sunburn or a bug bite, a cup of salts in the bath eases discomfort.
6. Deter Slugs – Epsom Salt is well known for deterring slugs. Sprinkle a line along their path to keep them away from your garden.
7. Make Richer Soil – Before new plantings add a few bags of Epsom Salt with water to the patch. It can replenish the magnesium levels and make for a richer soil.
8. Super Pot Scrubber – Got pans with burnt on food? Use a ½ tablespoon of the salt as a scrub. Rinse well with warm water and your pans will be clean without having to soak overnight.
9. Hair Volumizer – This one is one of my favorites! Increase the volume of your hair by adding Epsom salt to a deep conditioner. Mix equal parts in a pan and warm. Leave on hair for 20 minutes. (Double check the temperature before using on your scalp.)
10 Relieve Itchy Skin – If you have itchy skin or are suffering from bug bites, try using Epsom Salt. Simply dissolve a tablespoon of epsom salt and mix with 1/2 cup of water. Wait for the mixture to cool and spray on skin or apply a wet compress.
What is your favorite unusual use for epsom salt? I’d love to hear more fabulous ideas!
Love these Unusual Uses for Epsom Salt? Be sure to check out some of the other Unusual Uses posts I’ve shared!
Original article and pictures take simplyshellie.com site
I love vinegar. It’s my secret weapon when I’m cleaning. I love how it gets my sink clean in seconds, gets all the hard water build up out of my kids’ humidifiers and makes the coffee pot sparkle. It really is a natural home’s best friend.
While I’m sure you use vinegar in a variety of ways around your home, check out some of my favorite unusual uses for vinegar. I hope you find a new little trick.
1. Stain Remover – Vinegar is especially good for those pesky underarm stains. These can be very difficult to get out; especially if you wear antiperspirant with aluminum. Spray full strength vinegar onto stains before washing.
2. Fabric Softener – Also, in the laundry room, vinegar is a great fabric softener. Adding vinegar to the final rinse removes any residue and softens your clothes.
3. Clean Electronics – Vinegar is a great natural cleaner for all those keyboards, printers, etc. Mix equal parts water and vinegar in a bowl. Using either a damp cloth or Q-tip, clean the area directly and remember, never spray liquid directly on electronics.
4. Clean Scissors – We all have pairs of gummed up scissors. Using a rag or sponge soaked in vinegar, wipe the blades clean. Unlike soap and water, vinegar won’t cause rust or ruin the blades.
5. Get Rid of Hiccups or a Sore Throat – The hiccup cure may be more old wives tale than medical advice but supposedly drinking a teaspoon of vinegar gets rid of them. Maybe it is just the fear of the taste. A little more appealing is gargling rather than swallowing to rid yourself of a sore throat. Try mixing 2 tbsp of Apple Cider Vinegar in half a cup of water. Afterwards, drink some plain water to make sure the vinegar doesn’t remain in contact with sensitive areas.
6. Hair Rinse – This one I didn’t expect. Vinegar is good for your hair. Add ½ a tablespoon to a cup of water and use it as a part of your final rinse. It cuts residue and helps close the cuticle. Don’t like the smell? Add a few drops of your favorite essential oil. I love using lavender.
7. Furniture Polish – Use vinegar as a great alternative to regular furniture polish. Combine 1/4 cup of vinegar with a few drops of olive oil. Rub the mixture into the grain followed by a gentle buffing with a second clean cloth. If you are missing that lemon scent from the traditional polish, add a couple drops of lemon essential oil.
8. Remove Sticker Residue – We’ve all been there. You are doing laundry and you don’t realize your kids had stickers on their shirts and now it’s a gunky mess. Use vinegar to get it off! Heat a small bowl of vinegar. Use a sponge to saturate the sticker area with the warm vinegar. Let the vinegar soak in for a few minutes until the sticker residue loosens. Then rinse the area with cool water and wash like usual. If the item has already been through the dryer when you discover it, it may take several attempts to remove all of the lingering residue.
9. Clean Your Drain – Combining vinegar and baking soda is a very effective way to not only deodorize your drain but unclog it too. It’s not only cheaper but more gentle on your pipes that Drano or other heavy duty drain cleaners. To clear clogs in sinks and tub drains, use a funnel to pour in 1/2 cup baking soda followed by 1 cup vinegar. When the foaming subsides, flush with hot tap water. Wait five minutes, then flush again with cold water. It not only clears the blockage but washes away bacteria that can cause odor.
10. Clean Thermoses – Yes, those ridiculously difficult things to clean; especially if your child insists on milk at lunchtime. Fill the thermos with a ¾ water and ¼ vinegar solution. Then add a small amount of uncooked rice. Close the thermos and shake. Rinse well and let air dry.
What’s your favorite unusual use for Vinegar? I’d love to hear more fabulous ideas!
100 Self Improvement Tips That Will Make Your Life Better
Work on yourself more than you do on your job. – Jim Rohn
I am a huge fan of self improvement because I love to learn and grow. It’s what life is all about.
So, I’ve come up with a huge list of self improvement tips that you can use in your life that I use and love in mine.
The tips are broken up into the eight life categories that I talk about: health, relationships, finances, career, personal/spiritual development, recreation/fun, environment, and service (for more on setting goals with these topics, download my Goal Setting Action Plan).
I quit my six-figure job, took a 50% pay cut, paid off over $100k in student loan debt, and I make $4k+/month blogging. None of this would be possible if it weren’t for focusing on self-improvement. It’s how I got started with everything.
So, here are my best tips for you to get started, too!
100 Self Improvement Tips That Will Make Your Life Better
Health
Create a meal plan. Planning out your meals ahead of time will help you spend less money and stick your health goals. A great meal plan is the $5 Meal Plan. People love this one!
Stop eating fried food. Fried food makes you feel awful for ~24 hours (not to mention it lacks nutrients). You’ll feel better if you cut out fried food.
Don’t go more than 3 days without exercising. Exercising gives you energy, helps relieve stress, and helps you get fit. It’s too hard to squeeze it in every day sometimes, but don’t go more than 3 days without it.
Eat minimal dairy. If you have a sensitive stomach, try cutting out dairy. For some people this can eliminate digestive problems.
Cut out one of the following: pop, coffee, alcohol, or sugar. If you could cut all these, then even better (but I would think you are a superhero)!
Get enough good sleep. This may be 5.5 hours or it may be 8 hours – whatever it is for you, make sure you get it. The quality matters just as much as the time spent sleeping. Sleep allows you to regenerate and gives you greater concentration.
Focus on building strength more than on being skinny. This will create positive goals that are attainable and healthy for you.
Make sure you get enough Vitamin C and D. Both of these can impact your health in a positive way if you get enough (and can have the opposite effect if they’re lacking). Check with your doctor which vitamins she recommends.
Drink enough water every day. A good rule of thumb is to divide your body weight by 2 and that’s how many ounces you should drink.
Keep track of your annual, routine doctor appointments and don’t miss any. Put a recurring reminder on your calendar for things like dental checkups, skin checks, and physicals so you don’t miss any. Take your preventative care seriously.
Take fitness classes or hire a personal trainer. If you struggle to get fit, classes or a trainer are great ways to go. Just make sure you can afford it!
Subscribe to a health blog. Learn about healthy living as a lifestyle practice little by little every day. Here’s a list of 10 of the best health and wellness blogs.
Relationships
Be your own best friend. Learning to love yourself will create a centeredness that everyone deserves to experience. You’ll be happier in every area of your life.
Set relationship goals. You wouldn’t start a business, career, or anything else super important without setting goals, so why skip relationships? Start small and come up with goals together.
Put as much effort into your relationships as you do into your work. This is hard for type-A, achievement oriented people. However, it’s absolutely necessary. People matter the most. Prioritize your people.
Give people the benefit of the doubt. If you make this a practice, you’ll be happier. You won’t question people as much, and you’ll find that you’re less judgmental.
Have family meetings. Discuss how things are going, including your personal goals, financial goals (here’s how you can set up budget meetings), and anything else. It’s good to have a time to check-in with each other.
Call one friend or family member once a day. It’s important to stay connected to the people most important to you. Instead of feeling overwhelmed by the need to stay in touch, simply call one person you care about every day. This way, over time, you’ll stay in touch with everyone.
Don’t be a victim. Whatever your circumstances are, take ownership of them. Then, take action. If you feel like your situation is someone else’s fault, you’ll never change it.
Learn to argue productively. Arguing is part of any healthy relationship. Learn how to do it constructively and respectfully. No name calling or yelling.
Say sorry the right way. Don’t use “ifs” in your apologies (e.g.: “I’m sorry if I upset you). Address your apology head-on and take responsibility for your actions. Here’s a 4-step guide on how to say I’m sorry the right way.
Don’t put your partner down in public. This is one of the worst things you can do. It’s disrespectful and harms the relationship.
Stop negative thoughts about other people when you begin to think them. This practice can become a habit, and when it does, you’ll get out of a negative mindset. You’ll be happier and less judgmental, too.
Commit to playing with your kids regularly. It’s not enough to provide for them financially. They need your time (and quality time at that).
Prioritize your kids over your work. This is hard for the breadwinner of the family, but it’s worth it. Your regrets at the end of your life will be about people – not work. Prioritize your people.
Finances
Check your financial accounts daily. This habit will keep you informed on the reality of your financial situation. It’s a simple action that can pay off big.
Spend less than you make. This rule is so simple, but so hard to follow for so many people. If you live by this rule, you have a shot at building an extraordinary financial future. Learn how to start a budget to get started.
Check your credit reports annually. This will help you know whether your identity has been compromised and what your credit score is. I put this on my calendar to do every January, which helps keep it as a habit. Here’s a step by step guide that walks you through how to check your credit reports.
Get out of debt. Debt holds you back from options. It requires you to be a “slave to the lender” as they say. Learn how to get out of debt and stay out.
Make more money. If you have an income problem (meaning you don’t make enough money to cover your expenses and reach your financial goals), then find ways to make more money. Here are my best resources for learning how to make more money:
Pay yourself first. You’re always going to find ways to spend your money, even with pay increases. To make sure you’re saving, auto-deposit money into a savings account immediately when you’re paid. Learn how to automate your savings.
Put more financial margin in your budget. Find ways to cut spending and make more money so you have more money left at the end of the month as a buffer. Remember, it’s better to want than to owe.
Spend money on experiences (not things). Research shows spending on experiences results in being happier. You will remember the experience you had and not the stuff you bought.
Save for retirement. If you want to retire one day, you need to plan for it. The earlier you start, the more you benefit from compounding interest. Read my Retirement Blog Posts to get started.
Hire a financial advisor if you can afford it. Having the right professional manage your money can give you an advantage and help you succeed financially. But make sure you hire the right advisor for you. Here’s a list of 15 questions you should ask your financial advisor.
Career
Do work that fulfills you. This will make every day fly by. You’ll be happier and content with your life. Don’t give up until you find it.
Quit your job if you hate it. Life is too short to spend it doing something you hate. That’s why I quit practicing law to become a financial planner and blogger. I couldn’t be happier!
Find ways to work from home. There are so many ways you can make money from home. If you can with your full time job, that’s great. If you can’t, then find other ways to increase your income streams. Here’s a list of work from home posts on my blog:
Get a mentor. A mentor is a professional coach of sorts. Having someone you trust who is doing what you want to be doing can pay off big time.
Dress for the job you want. It pays to be well dressed for the job you want. People will see you in that roll. This advice is worth so much if you actually do it.
Remember that likeability matters to work. There are studies that show likeability is one of the most significant factors in getting hired and promoted. Make an effort to fit in with the culture.
Take constructive feedback positively. This can help you grow and become better at your job.
Give praise to people you work with. Doing this publicly will make people feel appreciated, and they’ll like you more for it, too.
Focus on increasing the skills you’re good at and outsourcing what you’re bad at. You’ll get more done, enjoy what you’re doing more, and find more down time if you do this. Don’t waste time focusing on what you’re bad at. Get someone else to do it who is good at it.
Read books about career development. Enhance your skills by reading about career development. This will help you excel faster because you will grow faster. Here’s a look at my recommended book list.
Personal/Spiritual Development
Use Dream Year to create a year, month, and weekly plan for yourself. This is my goal-setting workbook that shows you how to get anything you want in life. I created this so you can learn how to be happy and success while pursuing your #1 goal. There are a ton of templates and workbooks for you to use to get the results you want in your life.
Find a way to express gratitude daily. This is one small way to be happier every day. It can change your perspective to a positive mindset, which will carry over into all aspects of your life.
Stop being a perfectionist. It gets in the way of your happiness (and it annoys other people)!
Get comfortable saying “no”. If you don’t, other people will decide the course of your life. Instead, say “no” to what you don’t want to do, so you can have room for what you do want to do.
Work through past issues with a therapist. If you have past issues to work on, take care of them now. They will only get worse if they’re unresolved.
Forgive regularly. When you forgive, you set yourself free from resentment and pain. It’s not about the other person. It’s about you.
See the world with a glass half full mentality. You can learn to train yourself how to be happier and have a positive attitude. The book The Happiness Advantage by Shawn Achor can help you learn how to do this.
Be an abundance thinker (not a scarcity thinker). Abundance thinkers welcome competition, default to trust, and are optimistic about the future. Scarcity thinkers fear competition, assume mistrust, and are negative about the future.
Listen to podcasts during your commute. One great way to learn while you’re wasting time is during your commute. I am obsessed with The Life Coach Podcast for self improvement. Start at episode 1 and go forward. It’s life changing.
Evaluate your experiences. You don’t learn from your experiences. You learn from evaluating your experiences. So, evaluate yours to change and learn.
Start a blog about something you love. Blogging is a great way to focus on personal development. It’s the way I have, and I can’t imagine my life about it. Blogging is a platform you can use to learn about any subject.
Stay motivated. Like Zig Ziglar said, “People often say that motivation doesn’t last. Well, neither does bathing – that’s why we recommend it daily.” Here’s 6 podcast episodes for motivation that I’m obsessed with.
Limit your TV to less than 30 minutes / day on average. TV is such a time suck and it’s completely passive. Instead of watching TV, evaluate a better use of your time that aligns with your values.
Start meditating. Meditation can be one of the most useful ways to relieve stress and find inner-contentment. It also helps with anxiety. Feeling stressed? Try a meditation app to get started.
Get out of your comfort zone. Personal development means growing as a person. And the only way you’ll grow is from new experiences, which often require you to get out of your comfort zone. The more you get use to this, the easier it becomes.
Have faith in something bigger than you. Believing in God or another higher power can make your life more meaningful. Decide what you believe in and commit to that.
Go to church. Or wherever suits your fancy! J Just get around people who believe in something like you do. It’s good for your soul.
Know what you want from your life. If you don’t know what you want, you’ll wander somewhere you may not like. To avoid this, set visions in each life category (more on visions here) so you know where you’re headed.
Set goals. Goals will help you create a roadmap of how to get where you want to go. Learn how to set goals to get started using the SMART method.
Create a mission statement for your life (or one area of your life). Using a mission statement can help you focus on your number one priority. This helps make decision-making easier.
Have a go-to activity to get you out of a funk. Whatever works for you – do that. Whether it’s going for a run, taking a nap, painting, etc. Find an activity you do that helps you clear your mind.
At the end of the year reflect on the prior year by going through your calendar. Something I learned from 15 Invaluable Laws Of Growth by John Maxwell and have been doing for years. It helps you prioritize your time and money by looking at what you did the year before.
Journal regularly. Journaling is a way to express your thoughts in writing. It will bring you clarity in a deep way. A side effect of journaling is documenting life events, too. I am obsessed with the Five Minute Journal and The Productivity Planner – I use both every day. Find what works for you. Here’s a look at a review of 8 journals and planners to get started.
Read at least one book a month. Reading will help you grow and develop. Reading is where you can excel with self-education. Here’s a look at my reading list.
Wake up early. You can benefit from starting a morning routine every day. Push your alarm clock time back one minute every day until you’re waking up early enough to do your morning routine.
Create a morning routine that you do before work. If you prioritize going what’s important to you before you start work, the day won’t escape you and you’ll actually do these things. Examples include journaling, working out, praying, etc. Here’s a post that will teach you how to create a better morning routine.
Keep notes in a digital folder. Set up an online account where you can keep notes (I use Evernote). It’s amazing what you’ll discover you want to remember (notes from books, quotes you hear, podcast episodes, etc.).
Read personal development blogs. To continue to learn and grow, spend time reading up on personal development blogs. Here’s a link to the Personal Development Page on my blog.
Recreation/Fun
Make time for fun if you’re an overachiever. Fun is necessary to your health and happiness. For the type-A, overachiever, put fun in your schedule. You’ll enjoy life more.
Cut back on fun if you’re an underachiever. The opposite is true if you tend to spend all your free time having fun. If you are disorganized, haven’t cleaned in a while, or have no idea what your goals are – cut back on the fun and spend time thinking and working on personal development.
Pursue a hobby that you love – just for fun. This will give you ownership of something you do just for you.
Find creative ways to have fun experiences without spending a lot of money. Getting creative with your fun on the cheap will push you outside your comfort zone and into new experiences you wouldn’t otherwise have.
Laugh, be silly, and find your inner child. Play (anything for the joy of doing) has the power to significantly improve everything from your brain power to personal health to relationships to your ability to innovate.
Get outside and play. The outdoors allows you to explore and take adventures in a way you can’t get otherwise.
Laugh as much as possible. Laughter is good for the soul. Laughter gives you a jolt of happiness instantly. If you can increase how much you laugh, you can increase your overall happiness.
Environment
Create a vision board for motivation and inspiration. Having your visions and goals in front of you is a great way to stay on track with where you’re headed in life.
Stay organized. Implement organizational habits that instill organization across all areas of your life, including your home (every room and closet), your office, and anywhere else you spend time. An organized space will help you clear your mind.
Plan your weeks and weekends ahead of time. Use a calendar (digital or manual) and keep it in the “month view”. This will give you an overarching view of the month so you can plan your week and upcoming weeks ahead of time. I use my gCalendar for this. I use the Productivity Planner for weekly planning.
Keep a to-do list. Alongside your calendar, keep a list of actions you want to complete. Check off each item as you complete it and add to it as you have more things to get done. Knowing what your priorities are will help you accomplish your goals without getting sidetracked.
Purge anything you haven’t used or worn in over a year. Go through every item in your closet that you haven’t worn in over a year and yourself if you love that item. If you don’t love it, get rid of it.
Do your most important task first every day. This will help you accomplish your goals and avoid getting sidetracked by day to day distractions.
Commit to one cleaning or organizational task per day. Small tasks compounded over time lead to great results. This will keep your house nice and tidy!
Read The Life Changing Magic of Tidying Up by Marie Kondo. This book is a well renowned organizational manual with actionable tips that can change the way your organize forever.
Service
Practice generosity. Instilling generosity as a way of life can impact the world in a huge way. And as a side effect, you’ll be happier, too.
Appreciate where you are in life. When you are thankful for your circumstances, you are stronger because you’re not a victim.
Practice mindfulness. Learn to be present and mindful of the moment. While planning ahead is good, don’t let that detract from being present and centered.
Create a gratitude jar that you put one note into every week. Expressing thankfulness on a weekly basis will help you be aware of how lucky you are in addition to give you something at the end of the year to look back on. I’m doing this now and it’s really fun!
Practice gratitude. The more you express how grateful you are, the happier you’ll be. You’ll also attract more positive things into your life. The fastest and easiest way to practice gratitude is with the Five Minute Journal, which is what I use.
Be a mentor. This is a rewarding way to give back to the younger generations.
Volunteer and give your time. Giving your time (your most precious resource) is a profound way to give back.
Commit to donating a specific percent of your income every year. This is the best way I know how to practice consistent financial generosity.
A Final Note!
This post is an epic list of ways you can improve your life. After all, life is about finding contentment where you are while you pursue where you’re going.
This list gets at that. It will help you be happy now while focusing on progress in your life. You’ll be happier and design a life you love (at least that’s how it works for me)!